Home Studio for Creators: Budget Setup Checklist
A “home studio” sounds expensive, but for most creators it’s really just a repeatable corner that makes you look good, sound clear, and keeps your workflow f...
A “home studio” sounds expensive, but for most creators it’s really just a repeatable corner that makes you look good, sound clear, and keeps your workflow fast. If you’ve ever filmed a set you loved, then spent two hours fighting shadows, noisy audio, or a messy background, you already know the real cost is time (and consistency).
This budget checklist is built for creators who want reliable quality without turning their bedroom into a production warehouse. You can start with what you have, upgrade in the right order, and keep privacy in mind from day one.
First, pick your “main format” (so you don’t waste money)
Before you buy anything, decide what you’ll shoot most in the next 30 days. Your main format determines what matters.
| Your main format | What matters most | What you can keep cheap | Biggest beginner mistake |
|---|---|---|---|
| Photo sets (feed + PPV) | Soft lighting, clean background, stable framing | Camera (a modern phone is fine) | Using harsh overhead lights and thinking “editing will fix it” |
| Talking videos (GFE style, voice-led content) | Audio, lighting, flattering angles | Backdrops | Echo-y room audio that makes everything feel “cheap” |
| Short clips for promo (TikTok-style edits, teasers) | Speed, consistency, simple setup | Fancy lenses, complex lights | Rebuilding the setup every time, then burning out |
| Live streams | Upload stability, lighting, power, audio | Decorative background | Wi-Fi dropouts and bad lighting that kills retention |
If your plan includes live, skim this too: How to Stream on OnlyFans Live Like a Pro.
The budget home studio checklist (in the right order)
Think of your studio as five layers. Nail layer 1 before upgrading layer 5.
1) Space: choose a repeatable corner
You do not need a whole room. You need a corner you can set up in under 5 minutes.
- Pick a spot where you can control light (close a curtain, turn off a lamp, shut a door).
- Keep the background boring on purpose (plain wall, tidy bed, curtain, backdrop).
- Remove “identity leaks” from frame: mail, family photos, diplomas, local sports team posters, anything with your real name.
- Put a small basket nearby for “frame killers” (random clothes, packaging, cords).
If you share space with roommates or family, this becomes a privacy choice, not just an aesthetic one. If anonymity is part of your brand, also read: How to Make Money on OnlyFans Without Showing Your Face.
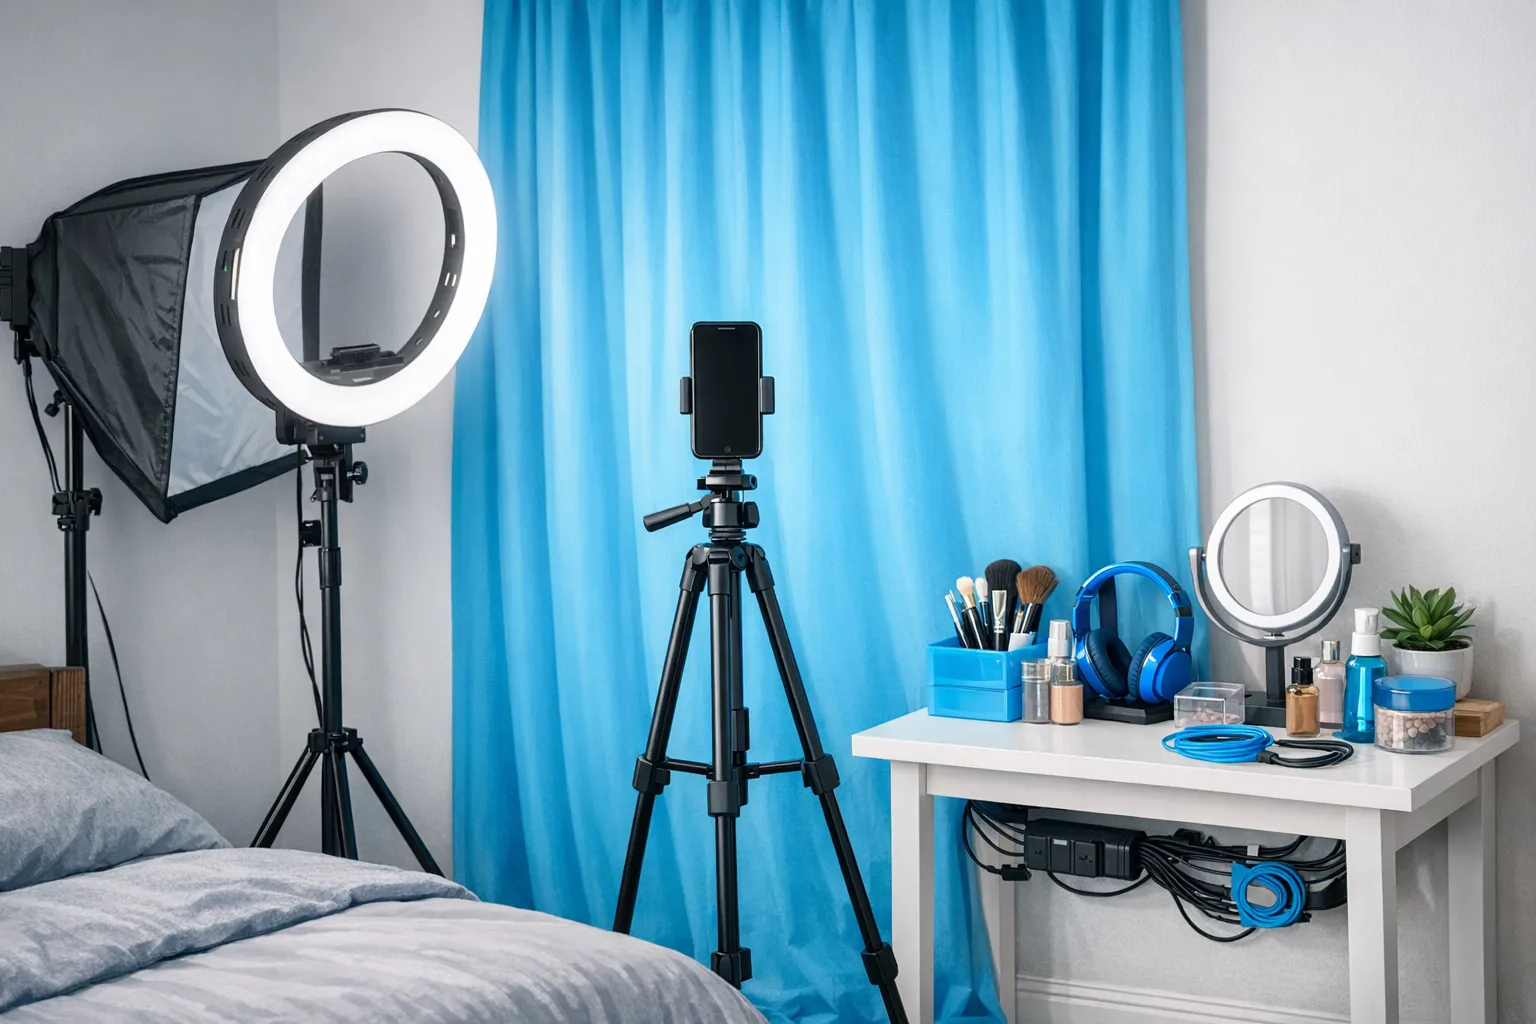
2) Lighting: the highest ROI upgrade
Lighting is the difference between “home video” and “professional,” even on a phone.
Your goal: soft, even light from the front, not overhead.
Practical options:
- Window light (free): Face the window, turn off ceiling lights, and use a sheer curtain to soften.
- One light (starter): A ring light or softbox placed slightly above eye level, angled down gently.
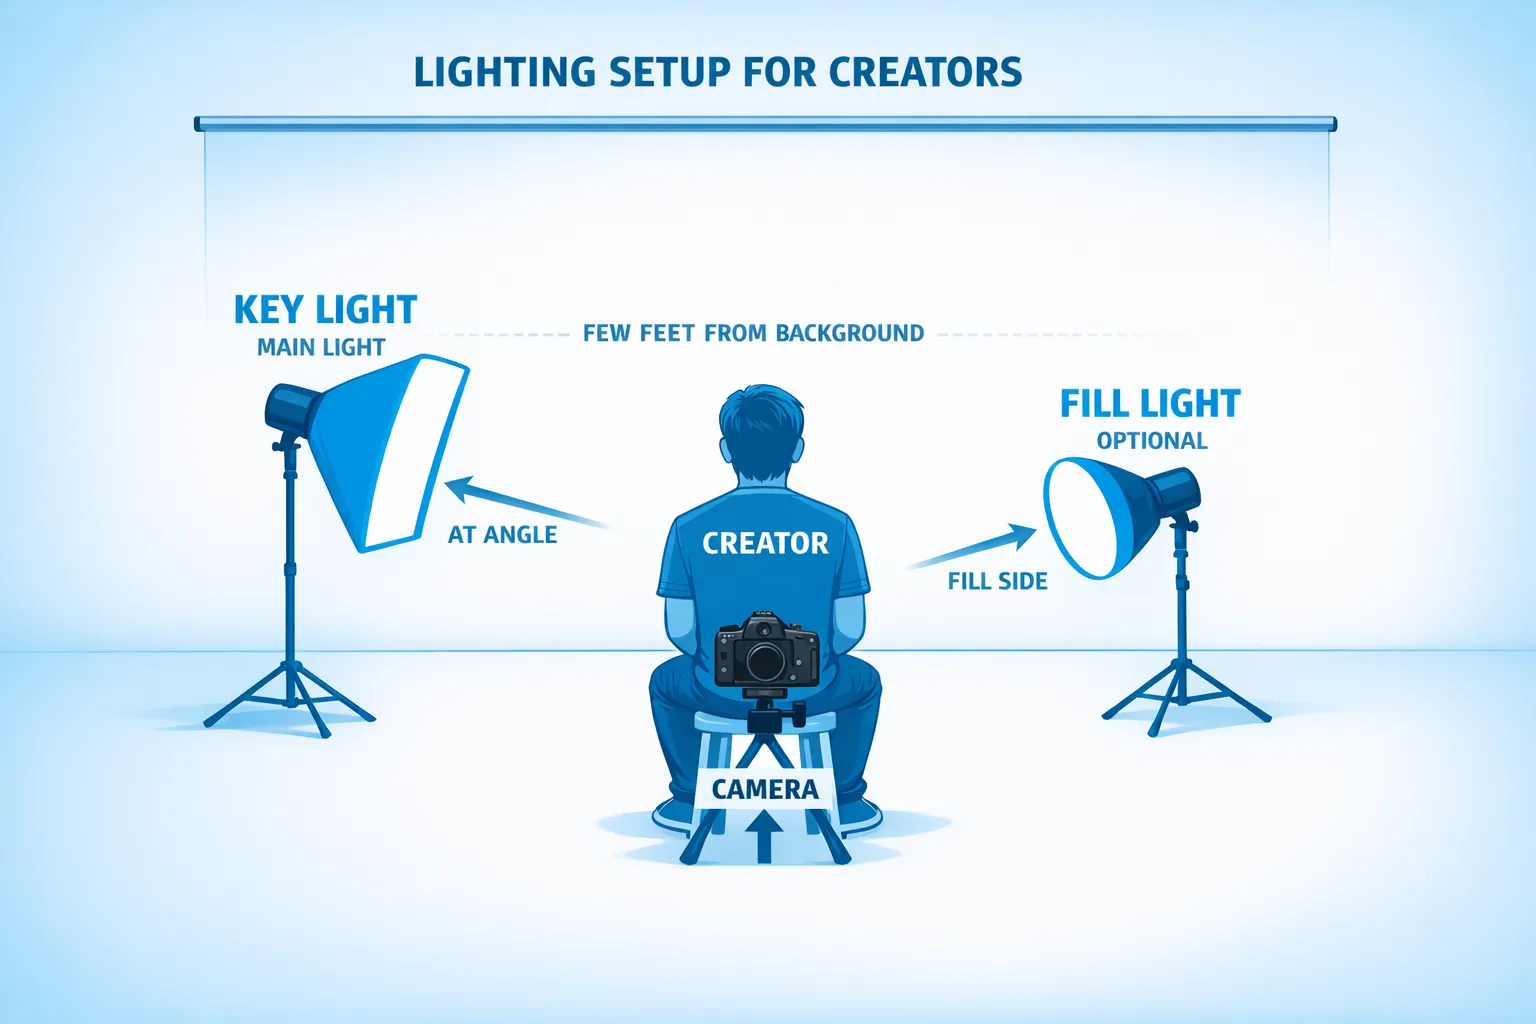
- Two lights (best budget upgrade): A key light in front, plus a cheaper fill light to reduce shadows.
Quick rules that save you hours:
- Avoid mixing color temperatures (for example, warm lamp + cool ring light) because your skin tone will look “off.”
- Keep the light source close enough to be soft, but not so close it blows out highlights.
- If your background is dark, add a little distance between you and the wall so you do not cast harsh shadows.
3) Audio: if they can’t hear you, they won’t buy
Creators often overspend on cameras and ignore sound. If you do talking content, moans, JOI-style voice, girlfriend experience, or any “intimacy” driven content, audio is the product.
Budget-friendly fixes:
- A wired lav mic or small wireless mic can be a big upgrade, often available in lower price ranges depending on brand.
- Reduce echo by adding soft things (rug, blanket, curtains). Empty rooms sound harsh.
- Close windows, turn off fans or AC for takes where audio matters.
If you only do silent photo sets, audio matters less. If you do video, audio matters immediately.
4) Camera + stability: stop filming “handheld”
A modern phone camera is usually enough to start. What makes it look expensive is stability and framing.
Focus on:
- Tripod: Any stable tripod that holds your phone securely.
- Lens cleanliness: Wipe your lens every shoot (it’s shocking how much this improves clarity).
- Angles: Slightly above eye level is usually more flattering than low angles.
- Gridlines: Turn them on and keep your horizon straight.
If you shoot on the bed a lot, a basic clamp arm or bedside stand can save you time and keep angles consistent.
5) Workflow: make “content day” easier than motivation
Your studio should support batching.
- Keep chargers plugged in where you film.
- Use one dedicated folder structure (for example: Raw, Edits, Covers, Upload).
- Back up your content to a secure drive or cloud storage you trust.
- Create 2 to 3 “default setups” you can repeat (same light placement, same camera height, same pose zone).
If you want faster editing and planning, you can also build a lightweight AI workflow (without losing your voice). Here’s a practical guide: How to Use AI to Make More Money on OnlyFans.
Budget tiers: what to buy first (and what can wait)
These tiers are intentionally simple. Prices vary a lot by country, brand, and sales, so use them as decision brackets, not exact shopping promises.
| Tier | Who it’s for | Core gear | What improves most |
|---|---|---|---|
| “Start Today” (almost free) | You need content now | Window light, cleared background, stacked books as a stand, earbuds for audio | Consistency and speed |
| Starter Budget | You want reliable quality | Tripod + one main light + simple backdrop option | Visual polish, less editing |
| Creator Pro Budget | You film often or do lots of video/live | Two-light setup + better mic + sturdier support mounts | “Pro” look, better retention, fewer reshoots |
A good rule: light first, stability second, audio third (or audio first if you do voice-led content).
The “privacy-first” home studio (especially if you’re no-face)
If privacy is a hard requirement, your studio setup should actively reduce risk.
Practical privacy design:
- Film against a plain wall, curtain, or backdrop so your room is not identifiable.
- Avoid mirrors unless you control reflections completely.
- Keep windows out of frame (neighborhood details can identify you).
- Use controlled, directional lighting that lets you crop or shadow parts of your face if needed.
On the platform side, creators often also use privacy tools like geo-blocking and ongoing leak monitoring. If you want a deeper privacy playbook, start here: How to Secretly Promote Your OnlyFans (Without Friends or Family Finding Out).
A one-hour setup plan (so you don’t overthink)
If you’re stuck in “research mode,” do this once and stop tweaking.
Minute 0 to 10: clear and simplify
Pick one corner, remove identity items, wipe surfaces, and place your “background” (wall, curtain, or backdrop).
Minute 10 to 25: lock lighting
Use either window light or your main light.
Do three quick test shots:
- One facing the light
- One with light slightly off to the side
- One with the light a bit higher
Choose the most flattering and save that placement.
Minute 25 to 40: lock camera position
Set your tripod height, turn on gridlines, and pick your “default crop” (full body, waist up, or close-up). Mark the floor with a small piece of tape if needed.
Minute 40 to 60: create a repeatable checklist
Write down your exact setup so next time takes 5 minutes:
- Light placement
- Camera height
- Where you stand/sit
- Which apps/settings you use
This turns your home studio into a system, not a mood.
Content-day checklists (pre and post)
A checklist sounds boring, but it prevents the two things that destroy consistency: reshoots and chaos.
Pre-shoot checklist
- Charge phone, lights, and mic
- Clear background, remove identifying items
- Turn off overhead lights (unless you intentionally use them)
- Test a 5-second clip for exposure and sound
- Prep 3 outfits/looks so you can batch without stopping
Post-shoot checklist
- Back up raw files
- Pick covers/thumbnails immediately (future you will thank you)
- Rename files so you can find them later
- Clean the corner so it’s ready for the next session
If you’re building a real promo funnel, tracking matters. This guide shows how creators measure what traffic actually converts: OnlyFans Tracking Links Guide.
Common home studio mistakes (and quick fixes)
Mistake: “The ceiling light is fine.” Fix: turn it off, face a window or use a soft front light.
Mistake: cluttered background. Fix: one plain wall or curtain, and a “clutter basket” off-camera.
Mistake: shaky video. Fix: tripod, clamp, or stable stand, then use a timer or remote.
Mistake: echo audio. Fix: add soft furnishings, move closer to mic, close the room.
Mistake: buying random gear without a plan. Fix: upgrade based on your bottleneck (lighting, audio, speed, privacy).
When it’s worth upgrading (a simple decision framework)
Upgrade when it removes a recurring problem that costs you money or time.
| Symptom | Upgrade that actually helps | What to ignore |
|---|---|---|
| You look grainy or dull | Better lighting, not a new camera | Expensive lenses |
| Fans love voice but videos feel “low quality” | Better mic + less echo | 4K cameras |
| You procrastinate filming because setup is annoying | Permanent corner + mounted stand + cable management | Fancy props |
| Lives drop or lag | More stable internet setup and testing | New backdrops |
If you’re already doing everything yourself and it’s turning into a second full-time job, read: Working With an Agency vs Running OnlyFans Alone.
Frequently Asked Questions
Do I need a DSLR to make high-quality content? No. Many creators start with a modern phone. Lighting, stability, and clean framing usually matter more than the camera body.
Is a ring light or a softbox better for beginners? Either can work. Ring lights are easy and compact. Softboxes can look more natural and softer on skin, but take more space. The best choice is the one you will actually set up consistently.
What should I buy first if I’m on a tight budget? Usually a stable tripod and one good light. If your content is voice-led, prioritize a basic mic even before a second light.
How do I make my setup more private? Use a plain background, avoid identifiable objects, control reflections, and keep windows out of frame. If anonymity is a goal, consider strategies designed for faceless creators.
Will a home studio help me earn more? It can improve consistency and perceived quality, which can help conversion and retention, but income depends on many variables (traffic, offers, DM sales, niche, pricing, and time).
Want to scale beyond “good content” and into real growth?
A home studio makes it easier to create consistently, but most creators plateau because the bottleneck is not filming, it’s marketing, DM monetization, and operational workload.
Lookstars is an OnlyFans management agency that supports creators with multi-platform marketing, 24/7 fan chatting, strategic posting management, and privacy-focused services like leak monitoring and takedowns. They also offer flexible, cancel-anytime contracts with no upfront costs (so you can stay focused on content).
If you want support turning your content into a scalable system, you can learn more and apply here: Lookstars Agency.
Ready to transform your career?
Join hundreds of creators already earning six figures with Lookstars Agency.
Share this article
Best OnlyFans Agency
Europe's Leading OnlyFans Management Agency.

100% Free Ebook
Get our guide and unlock the secrets to OnlyFans success.
100% Free Ebook
Get our guide and unlock the secrets to OnlyFans success.
Free Revenue Calculator & Profile Analyzer
Try them for freeContinue reading...
Am I Attractive Enough for an OnlyFans Agency? The Answer
Can You Ever Fully Delete Your OnlyFans Content? The Reality